Enable YubiKey on Bitwarden (Vaultwarden)
How to setup yubico's YubiKey 5 NFC on Bitwarden (Vualtwarden).


What is YubiKey?
Is a USB 2FA with NFC security key, enabling strong two-factor, multi-factor and password less authentication. This can be used on Windows, Gmail or password managers and many more.
Benefits using with Bitwarden?
Secure your vault with a physical 2FA for extra security. This can be added on top of your Google 2FA. This will be good for a "just in case" I lost my phone to access google authenticator.
Project Overview
This project uses Docker images based on vaultwarden/server project, the unofficial Bitwarden image, compatible server written in Rust, formerly known as bitwarden_rs, with YubiKey 5 NFC.
Review: Overall Thoughts
Easy, but confusing to setup since there isn't many written tutorials from my web search. Hopefully my project guide will help you do this without confusion!
Yubico API Key Signup
The first step is to sign up your Yubikey on the Yubico's website:
https://upgrade.yubico.com/getapikey/
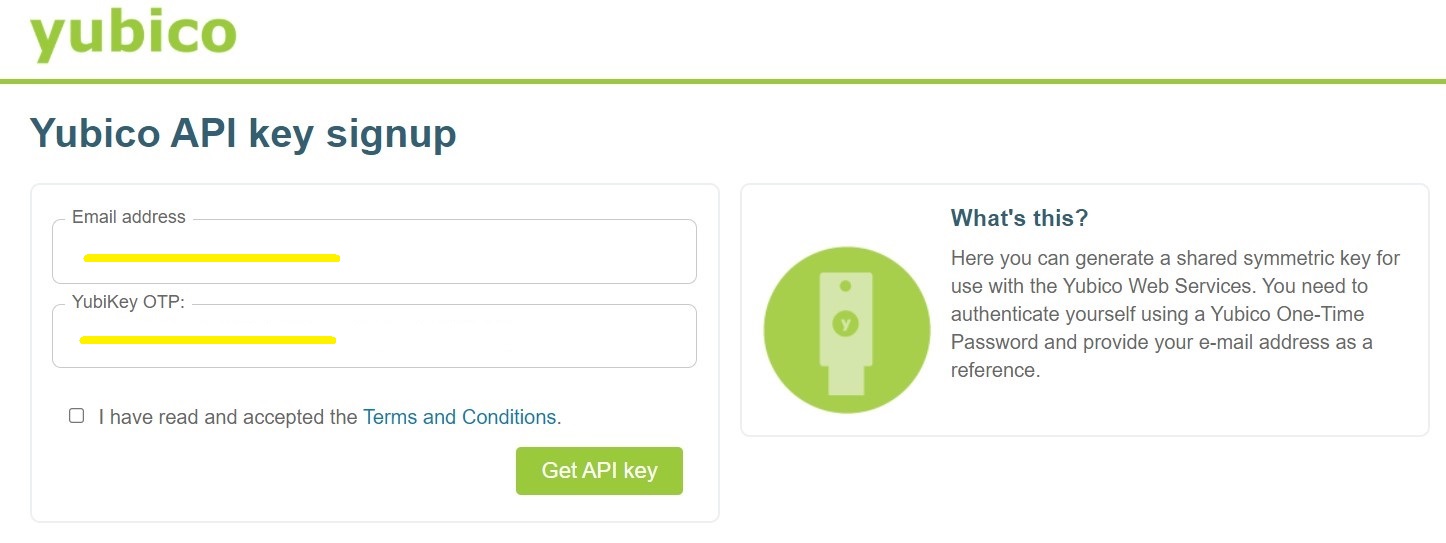
Email Address
Type your email address that you want to sign up with.
YubiKey OTP
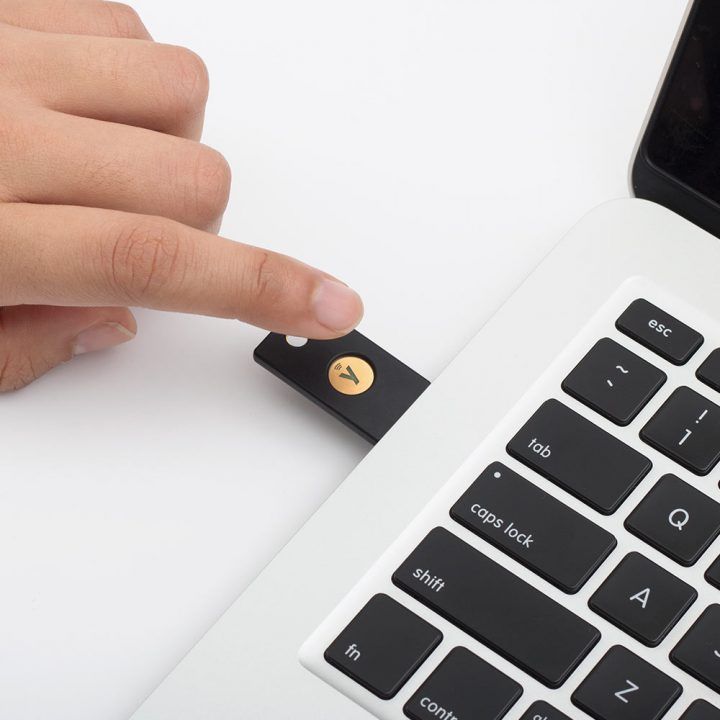
To get YubiKey OTP press your Yubikey 5 NFC. This will generate the code automatically.
Finish API Key signup
Once you filled up your email address and YubiKey OTP, click the terms and conditions and Get API Key.
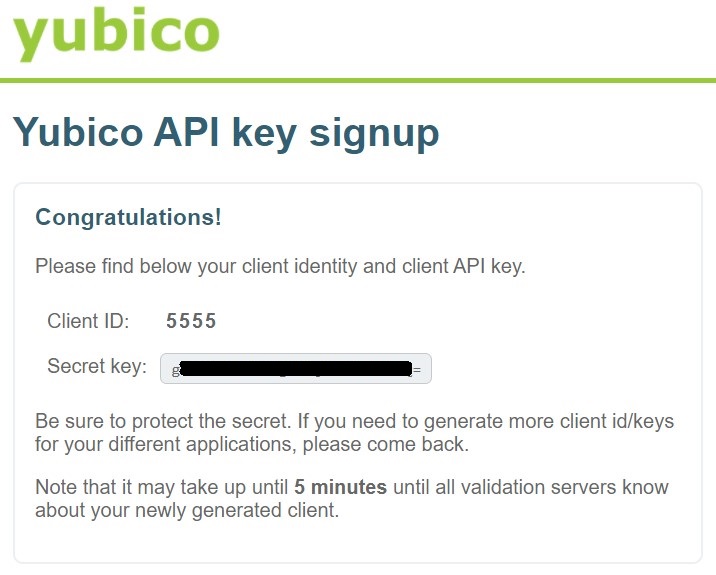
YubiKey Client ID & Secret Key
The generated values will be used on your Docker environment variables YUBICO_CLIENT_ID and YUBICO_SECRET_KEY.
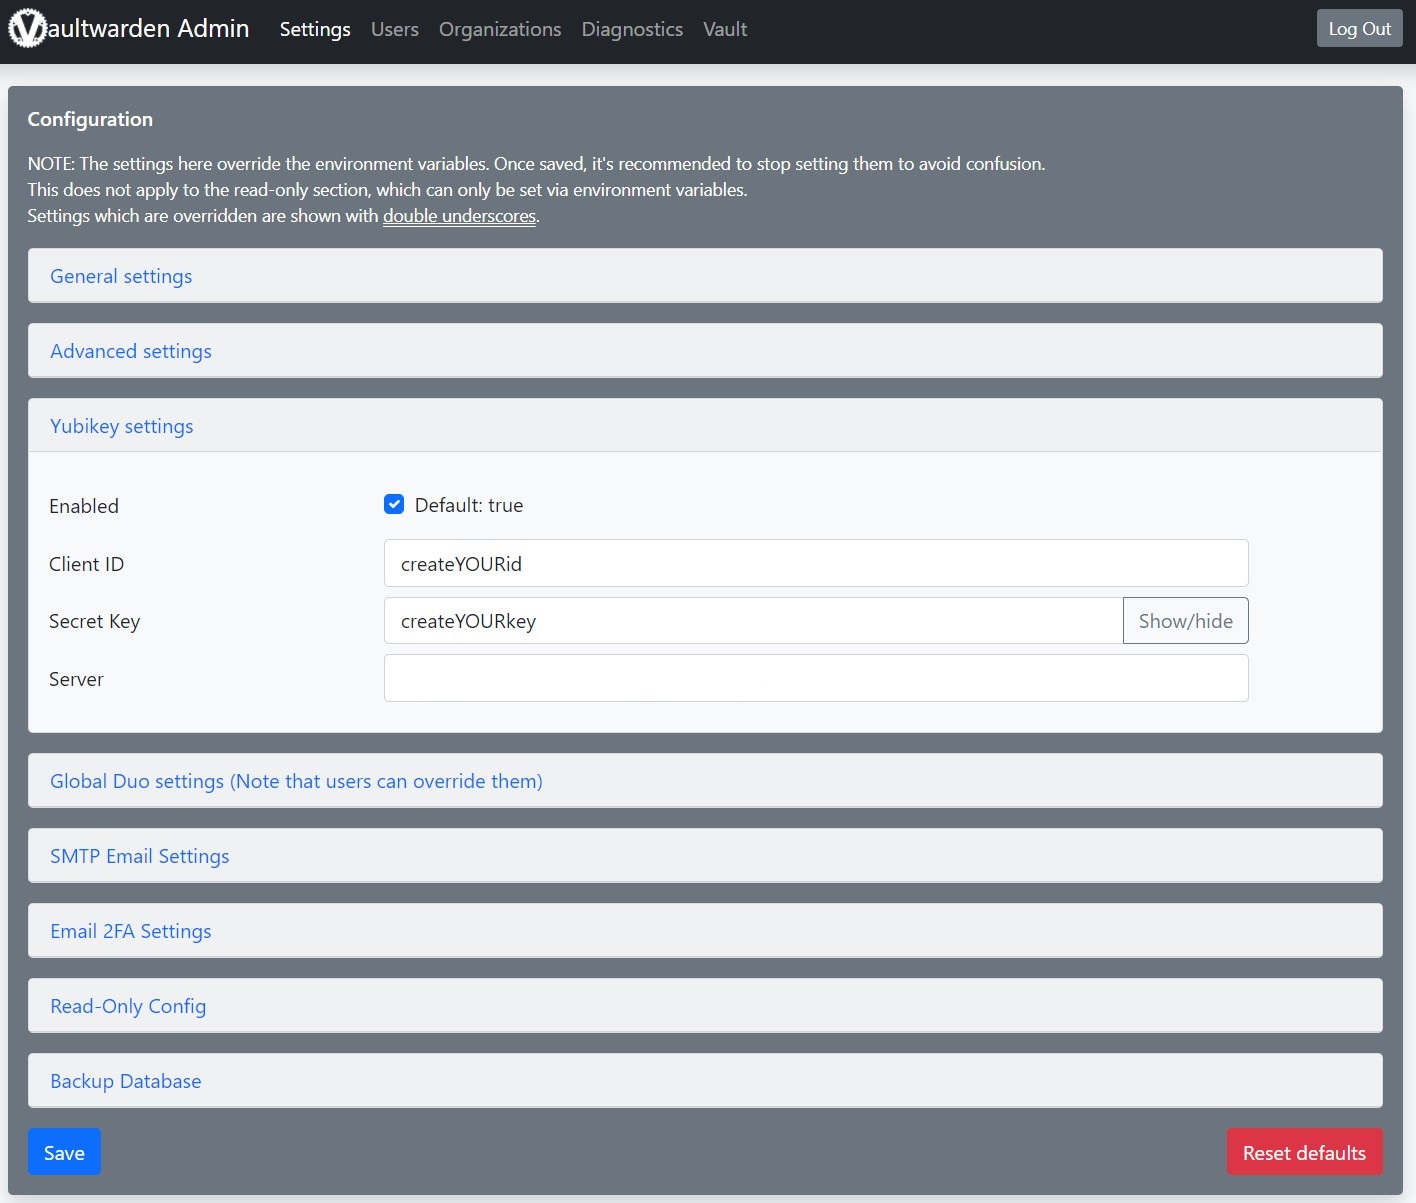
Vaultwarden Admin
The second step is to head to Vaultwarden's /admin web UI, instead of the Docker environment variables. Input your generated Client ID and Secret Key on the YubiKey settings and leave the Server blank. Hit save and exit.
Optional: You can also put it on your Docker environment, but I find it easier to input it on the web /admin.
Bitwarden Settings and Finish Setting
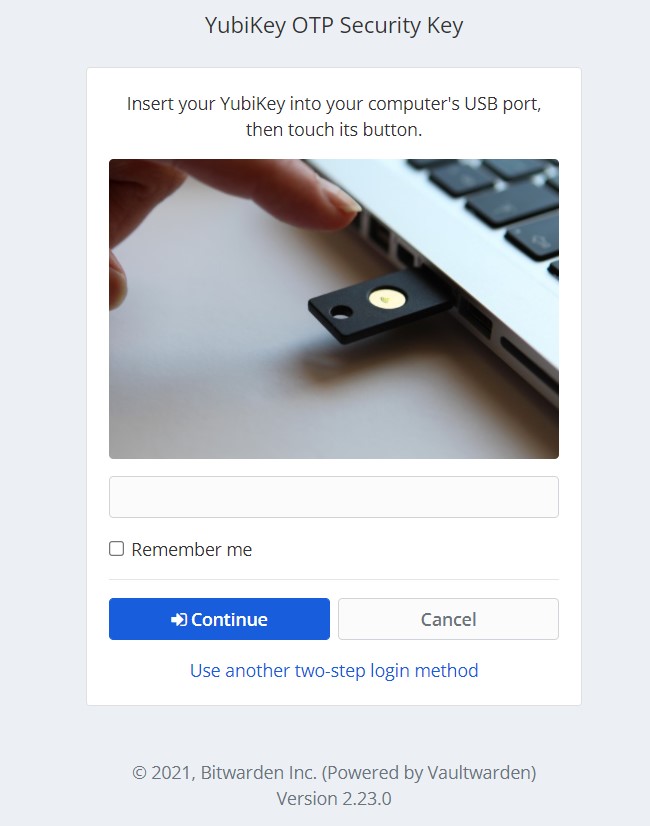
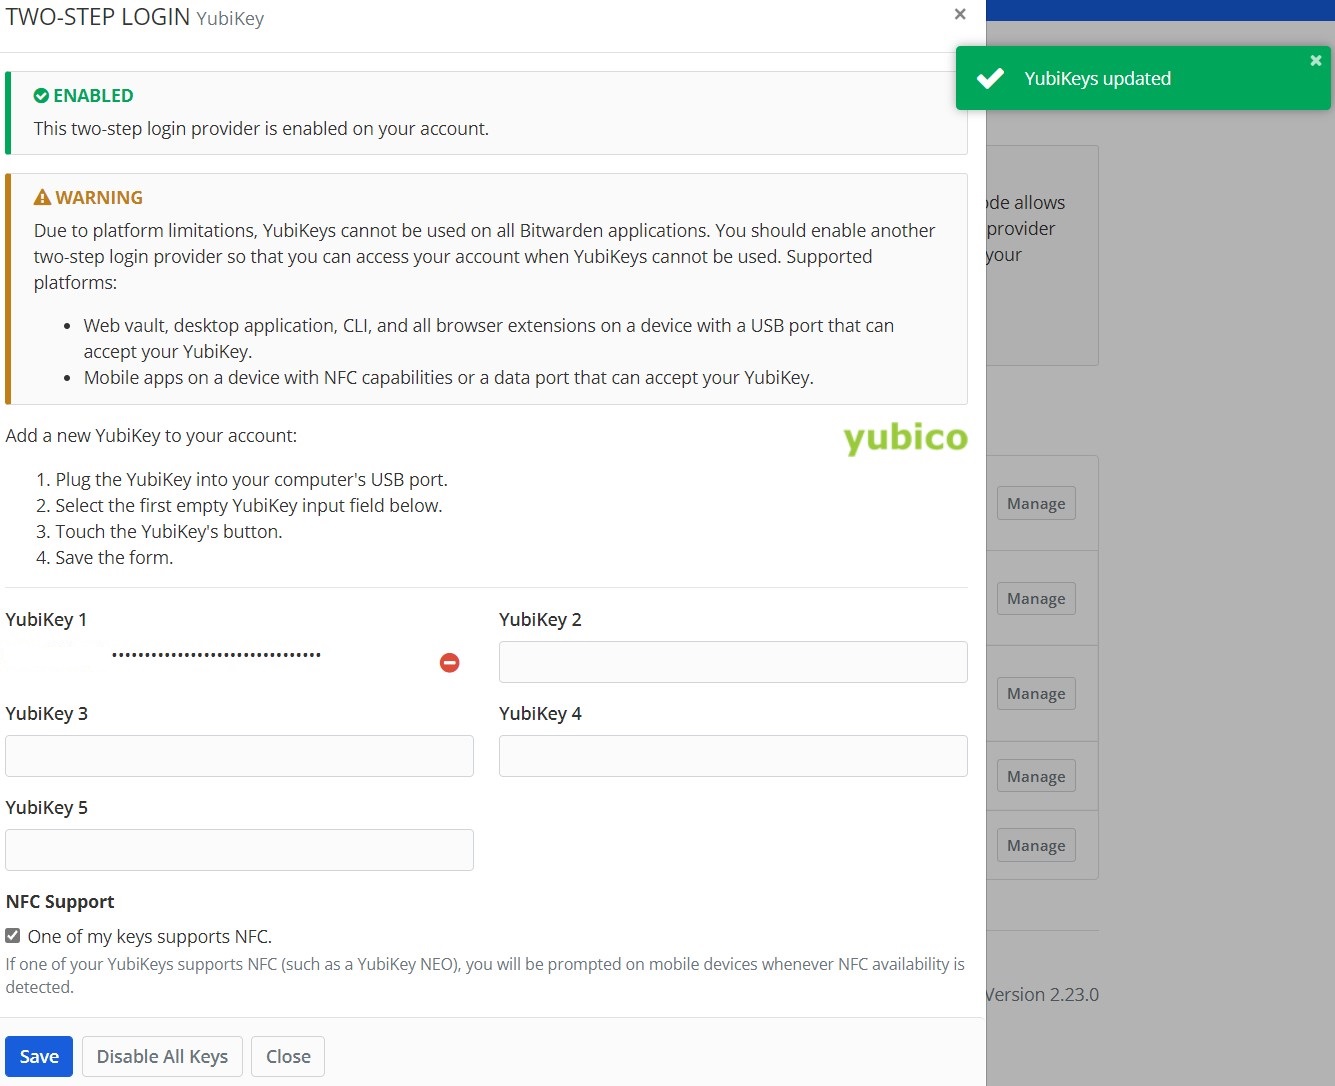
The third and last step is to go to your Bitwarden vault settings and go to Two-step Login tab. Select Manage on YubiKey OTP Security Key and follow instructions:
Plugthe YubiKey into your computer's USB port.- Select the first empty YubiKey input field below.
Touchthe YubiKey's button.- Save the form.
Test It on Bitwarden with YubiKey Login
If properly set up, when you go to your web vault shortly after you type your email and password, you will be prompted to enter your USB and touch the button.
- Touch your YubiKey
- Optional: Remember me
If you are able to go through using 2FA with YubiKey, you have successfully setup a physical security. You can also repeat these steps if you want to set up a new security key.