Subaru Impreza WRX '07 Oil Change with Futomu Drain Valve
How to change engine oil on Subaru Impreza WRX/NA/STI with Futomo drain valve.

How to change engine oil on Subaru Impreza WRX/NA/STI with Futomo drain valve.
Basic 101 oil change for Subaru Impreza WRX. This oil change has a bit of a twist by using a Futomo oil drain plug instead of the 20mm bolt for accessibility during oil changes.
This DIY and also be applied to most modern cars that is available to the market. It uses the basic principles and safety tips. The difference is engine oil requirements, measurements of the bolts and the accessibility of engine bay when changing oil.
Safety Tips
Even though this is considered an easy project, please be aware that there are always risks to consider. Ensure you wear proper gloves, eye projection and harness materials to ground the car so it will not fall or roll away to harm or damage yourself and any objects.
CAUTION (Hot): Oil, Engine surface without plastic
CAUTION (Car Rolling): Jack stands, Wheel Chock
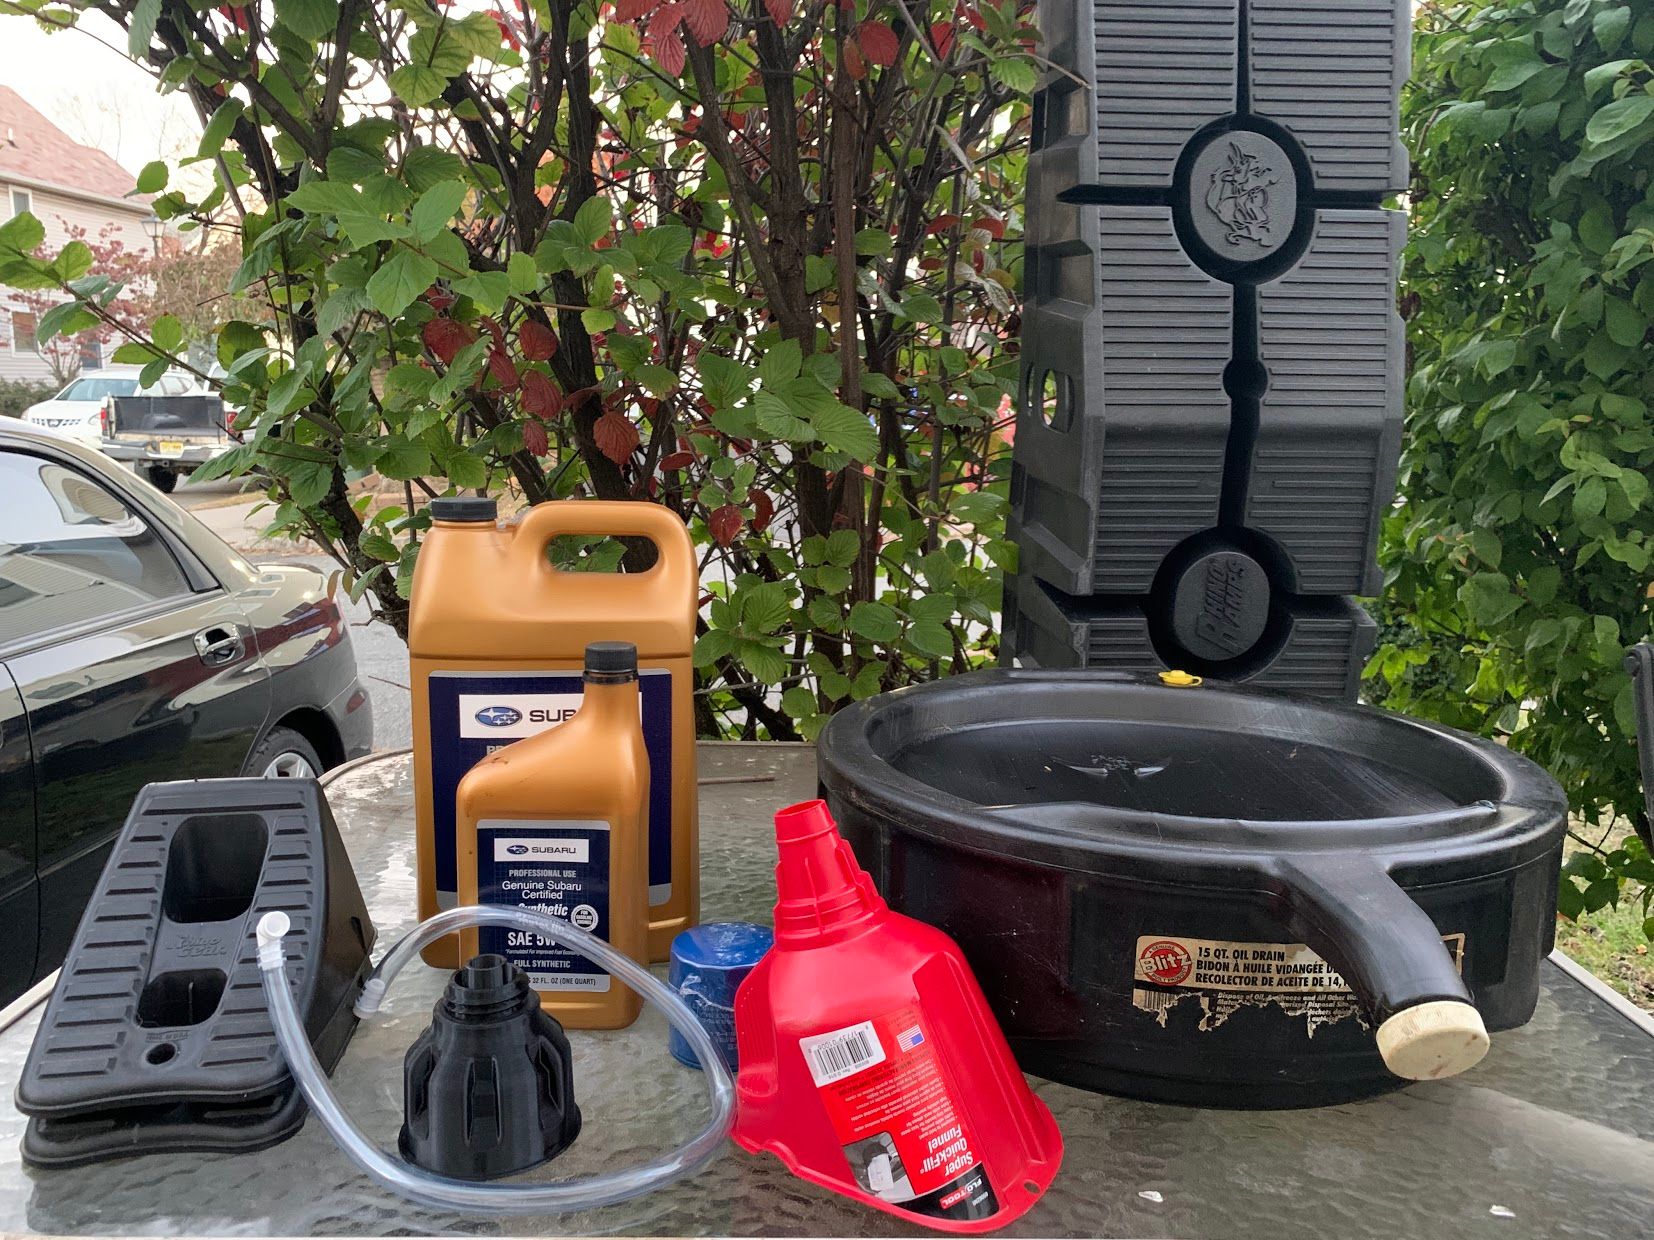
Materials, Tools and Measurements
Please check your manual for specific engine oil measurements made specifically to your engine by make and model.
These are the engine overview for this project.
| Motor Oil | 4.2 qt. Oil | 20mm Bolt | Bolt Torque | Oil Filter | Oil Filter Tq. |
|---|---|---|---|---|---|
| Subaru Synthetic Motor Oil | SOA427V1410 | Futumo F105S | 18 (ft lbs.) | 15208AA12A | Hand or 3/4 turn |
Here are some the parts and materials. Some are interchangeable and optional to you project.
| Materials | Description |
|---|---|
| OEM Drain Bolt | 807020010 |
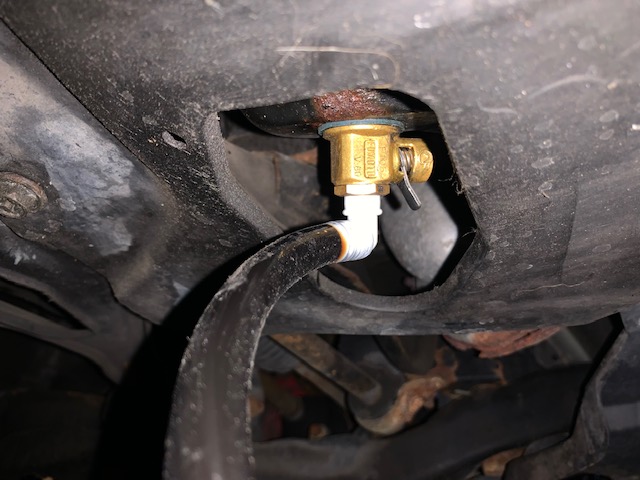
| Drain Vale | Futumo F105S |
| Funnel | Plastic quick funnel |
| OEM Drain Gasket | 11126AA000 |
| Jack Stands | High weight capacity |
| Oil Catch Pan | 2 Gallon or more |
| Oil Filter Pliers | 12" |
| Ramp | 36.5 x 13.05 x 11.05 inches |
| Socket or Wrench | 20mm |
| Wheel Chock | Heavy Duty |
Oil Change Preparation
Turn on the engine at surface level and let the engine sit for 5-10 min till the engine oil is warm. Then, cool engine for 3 min to cool the oil so the oil is not burning hot.
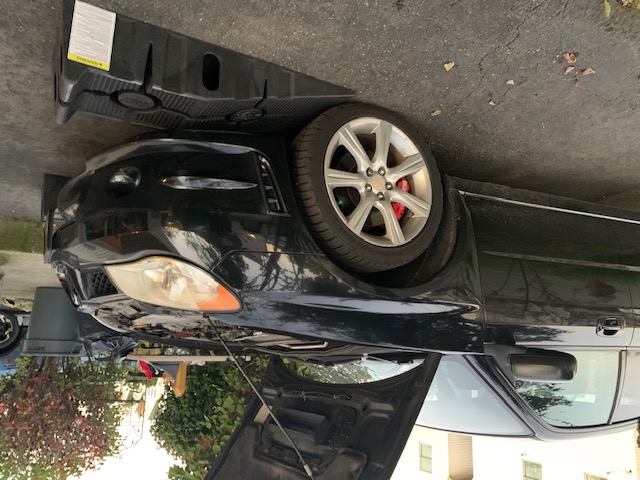
Engine Bay and Ground the Car
Put your car on a ramp, open hood, remove oil cap and put the latch up. Then, secure the rear wheel with the chocks. If you don't have wheel chocks use a rock so the car will not roll back. For extra safety, use jack stands to ground the car further.

Under the Hood and Remove Old Oil
After safely grounding your car to the ground you are ready to do the oil change.
Insert drain hose to the drain valve and direct the flow to the catch pan. Open the valve and let the oil flow till the oil is nearly empty. If you don't have a drain valve, loosen the 20mm drain plug and make sure the catch pan is directed towards the flow. This can get messy and also very hot. Clean surface area removing old excess oil.
Remove the drain hose and clean the area and close the valve. If you don't have a valve fasten the 20mm bolt to 18-20 ft lbs. torque or hand torque, then extra turn. Don't over tighten as it can cause oil leaks.
When the there is no more oil, lock the drain valve to relieve the pressure.
Drain the rest of the oil by removing the oil filter by a dry hand. Use oil plier if necessary is you are unable to loosen it up. Clean filter surface area of the surrounding.

Fill the new filter with motor oil and lubrication the rubber to prevent the filter from seizing for the next oil change. Place the new filter on the same slot where the old oil filter was placed and hand torque it till you hands are unable to turn it. Do not over tighten as it can cause oil leakage.

Top of the Hood and Oil Change
Remove engine oil cap and place the funnel on duct. Top off the engine with 4.2 qt. engine oil or recommended amount of oil for your vehicle.

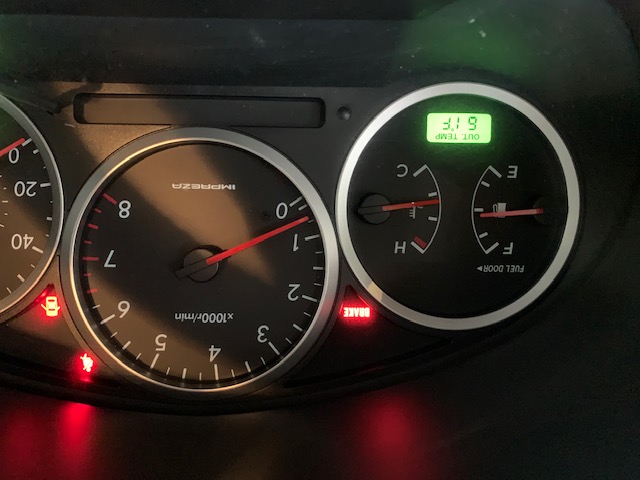
After topping the engine, check engine oil light to make sure there is no problem with the pressure. Wait 5 min to set oil in the engine (preferably on a FLAT surface).
Shortly after 5 min, check the oil dipstick level to make sure is is between Low to High of the stick. It is OK to put it on High, just make sure you don't overflow the engine, it may cause issues long term damages to your engine. Check dipstick in intervals to make sure engine has good amount of oil, since Subaru's tend to burn oil quick.
While you wait for 5 min, take this time to clean up, wipe excess oil and prepare to reverse the ramp process when putting your car back to the ground. Once you are done grounding the car to a flat surface and making sure everything is sealed, warm up the car for a couple of minutes and should be drivable shortly after.
Enjoy your DIY oil change. Success!